Zaman terus bergerak. Dari kehidupan yang serba manual dan sederhana, kini kita hidup di era yang serba digital dan cepat. Perubahan ini bukan hanya terjadi pada teknologi, tapi juga menyentuh setiap aspek kehidupan: komunikasi, pendidikan, pekerjaan, hingga cara kita bersosialisasi.
Dulu, Semua Serba Manual
Di masa lalu, informasi disampaikan lewat surat atau mulut ke mulut. Pekerjaan dilakukan dengan tangan, dan data disimpan di kertas. Belanja di pasar tradisional menjadi kegiatan rutin. Hiburan pun sederhana: menonton televisi, mendengarkan radio, atau bermain di luar rumah.
Namun, ada kehangatan dalam setiap interaksi. Manusia lebih banyak bertatap muka dan saling berbagi waktu secara langsung. Nilai-nilai kebersamaan dan gotong royong sangat terasa.
Kini, Semuanya Ada di Genggaman
Kehadiran internet dan smartphone mengubah segalanya. Komunikasi menjadi instan melalui pesan digital. Belanja cukup lewat aplikasi. Pekerjaan bisa dilakukan dari rumah. Bahkan, belajar dan kuliah pun bisa dilakukan secara online.
Kita memasuki era digitalisasi, di mana teknologi menjadi pusat kehidupan. Informasi menyebar lebih cepat, peluang terbuka lebih luas, dan efisiensi meningkat drastis.
Apa yang Kita Dapat?
Perubahan zaman membawa banyak manfaat:
Akses informasi jadi lebih mudah.
Peluang usaha tumbuh di dunia digital.
Pekerjaan dan pendidikan jadi lebih fleksibel.
Namun, tantangannya pun besar:
Interaksi sosial menjadi berjarak.
Ketergantungan pada teknologi semakin tinggi.
Privasi dan keamanan data jadi isu penting.
Menyikapi Perubahan dengan Bijak
Kunci utama dalam menghadapi perubahan zaman adalah adaptasi. Kita tidak bisa menolak perkembangan, tapi bisa memilih cara terbaik untuk menjalaninya. Nilai-nilai lama yang baik seperti kebersamaan, kerja keras, dan etika tetap harus dipertahankan, meski dalam balutan teknologi baru.
Penutup
Perubahan dari tradisional ke digital adalah perjalanan besar umat manusia. Bukan sekadar soal alat atau sistem, tapi cara berpikir dan menjalani hidup. Kita tidak bisa mundur ke masa lalu, tapi bisa membawa kebaikan masa lalu ke dunia modern.
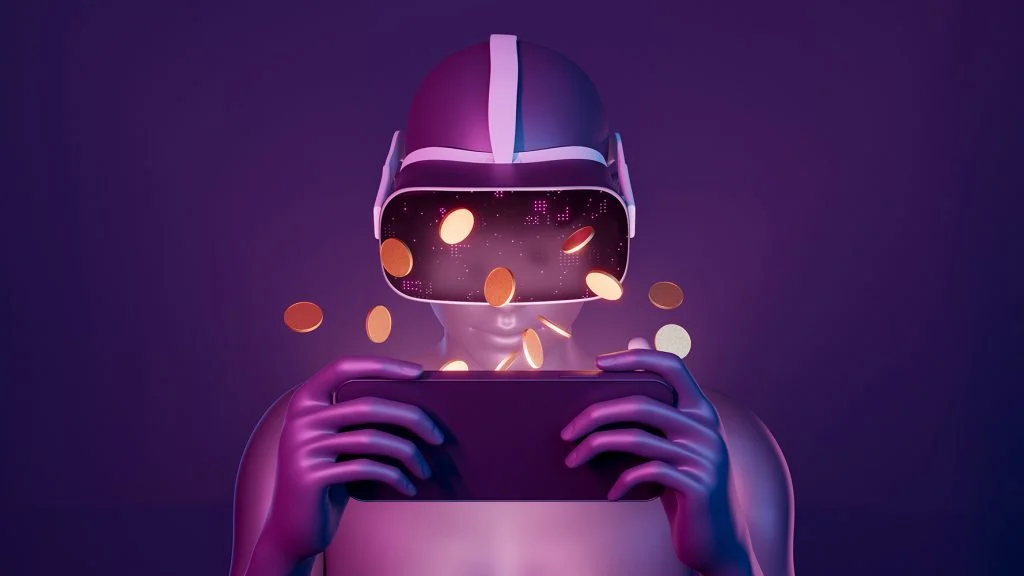
Industri game telah berkembang pesat dalam dua dekade terakhir. Dulu, game hanya identik dengan konsol sederhana seperti Nintendo atau SEGA yang mengandalkan grafis 8-bit. Kini, kita berada di era game modern dengan kualitas grafis fotorealistik, artificial intelligence (AI) canggih, dan pengalaman gameplay yang semakin imersif. Game modern tidak hanya menjadi hiburan, melainkan juga media interaktif yang menggabungkan seni, teknologi, dan komunitas global.
Perubahan besar terjadi seiring perkembangan hardware seperti GPU dan CPU yang semakin kuat, serta konektivitas internet yang cepat. Perusahaan pengembang game seperti Ubisoft, Rockstar, dan CD Projekt Red mulai menanamkan alur cerita yang kompleks, sistem multiplayer daring, serta elemen open-world yang memungkinkan pemain mengeksplorasi dunia virtual dengan bebas. Hal ini menjadikan game bukan hanya soal menang dan kalah, tetapi juga soal pengalaman dan eksplorasi.
Teknologi Kunci di Balik Game Modern
Perkembangan teknologi telah menjadi tulang punggung kemajuan game modern. Salah satu inovasi paling revolusioner adalah real-time ray tracing, yang memungkinkan pencahayaan dan bayangan terlihat sangat realistis. Teknologi ini digunakan dalam game seperti Cyberpunk 2077 dan Battlefield V. Selain itu, teknologi cloud gaming seperti GeForce NOW dan Xbox Cloud Gaming memungkinkan pengguna memainkan game kelas berat tanpa memerlukan perangkat mahal, cukup dengan koneksi internet stabil.
Selain itu, kecerdasan buatan (AI) semakin sering diterapkan untuk menciptakan NPC (non-playable characters) yang memiliki perilaku alami, membuat dunia game terasa lebih hidup. Game seperti Red Dead Redemption 2 memperlihatkan bagaimana karakter AI bisa bereaksi secara dinamis terhadap tindakan pemain. Tidak ketinggalan, VR (Virtual Reality) dan AR (Augmented Reality) membawa pengalaman imersif ke level selanjutnya. Pemain dapat merasakan seolah-olah mereka benar-benar berada di dalam dunia game, menciptakan pengalaman bermain yang tak terlupakan.
Ragam Genre dan Platform yang Menjadi Favorit Gamer
Game modern tidak lagi terbatas pada satu platform. Dari konsol seperti PlayStation dan Xbox, hingga PC dan perangkat mobile, semuanya menawarkan pengalaman bermain yang unik. Bahkan beberapa game populer kini hadir lintas platform, memungkinkan pemain dari berbagai perangkat bermain bersama. Contoh sukses dari ini adalah Fortnite dan Genshin Impact, yang bisa dimainkan di hampir semua perangkat modern.
Secara genre, preferensi pemain juga semakin beragam. Genre battle royale seperti PUBG dan Call of Duty: Warzone mendominasi dalam beberapa tahun terakhir. Sementara itu, game dengan narasi kuat seperti The Last of Us Part II dan Ghost of Tsushima tetap memiliki basis penggemar setia. Tidak kalah menarik, genre simulasi dan strategi seperti The Sims 4 atau Civilization VI tetap eksis dan terus berkembang, menarik pemain yang lebih menyukai permainan berpikir panjang.
Dampak Sosial dan Budaya dari Game Modern
Game modern bukan sekadar hiburan, tapi juga memengaruhi aspek sosial dan budaya masyarakat. Dalam banyak kasus, game menjadi sarana berkumpulnya komunitas global. Pemain dari berbagai negara dapat terhubung dan bekerja sama secara real-time melalui mode multiplayer. Bahkan, game-game tertentu telah melahirkan fenomena budaya tersendiri, seperti cosplay, turnamen esports, hingga konten live streaming di platform seperti Twitch dan YouTube Gaming.
Di sisi lain, perlu diakui bahwa game juga membawa tantangan, khususnya dalam hal kecanduan dan pengaruh terhadap perilaku sosial. Banyak negara kini mulai memperhatikan aspek ini, bahkan menerapkan regulasi seperti pembatasan waktu bermain untuk anak-anak. Oleh karena itu, penting bagi orang tua dan gamer muda untuk memiliki kesadaran digital yang tinggi, menjaga keseimbangan antara dunia nyata dan dunia virtual yang ditawarkan oleh game modern.
Masa Depan Game Modern dan Potensi Teknologi Baru
Melihat tren yang ada, masa depan game modern terlihat semakin menjanjikan. Penggabungan blockchain dan NFT (Non-Fungible Token) dalam game mulai diperkenalkan, memberikan pemain kepemilikan atas item virtual yang bisa diperjualbelikan. Konsep ini dikenal dengan sebutan GameFi(Game Finance), yang menggabungkan elemen permainan dan keuangan digital. Game seperti Axie Infinity dan Illuvium menjadi pelopor di bidang ini, meski masih menghadapi tantangan adopsi dan regulasi.
Selain itu, penggunaan AI generatif diprediksi akan mengubah cara game dibuat. Nantinya, pemain bisa mendapatkan alur cerita atau dunia permainan yang unik berdasarkan interaksi mereka secara real-time. Tak hanya itu, konektivitas 5G juga akan mendongkrak performa game mobile ke level baru, memungkinkan streaming game tanpa lag, multiplayer massal, serta kualitas grafis yang tak kalah dari konsol.
Kesimpulan: Game Modern Lebih dari Sekadar Hiburan
Game modern telah bertransformasi menjadi bentuk hiburan paling canggih dan inklusif yang pernah ada. Dengan dukungan teknologi mutakhir, beragam genre, dan komunitas yang kuat, game tidak hanya menjadi cara untuk bersenang-senang, tetapi juga alat untuk belajar, berinteraksi, bahkan mencari penghasilan.
Sebagai pengguna dan pencinta game, penting untuk tetap selektif dalam memilih game yang sesuai dengan kebutuhan dan usia. Memahami fitur, dampak, dan perkembangan teknologi game dapat membantu kita menikmati dunia digital ini dengan lebih bijak. Dengan begitu, pengalaman bermain game akan terasa menyenangkan, edukatif, dan tentunya aman di era serba modern ini.
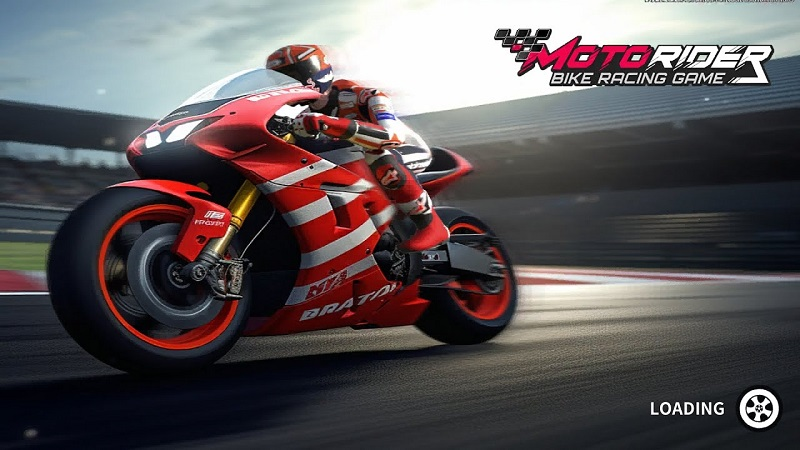
Permainan balap motor memang selalu punya tempat spesial di hati para gamer. Bagi penggemar kecepatan, tantangan, dan adrenalin, game balap motor adalah cara paling seru buat melepas penat sekaligus menguji refleks dan strategi. Dari generasi ke generasi, game balap motor terus berkembang – mulai dari grafis yang makin realistis, kontrol yang lebih presisi, sampai mode permainan multiplayer yang bikin kompetisi makin sengit.
Di tahun 2025, tren game balap motor makin ramai dengan hadirnya berbagai judul baru dari pengembang ternama maupun indie. Teknologi AI dan physics engine yang makin canggih membuat pengalaman bermain terasa nyata. Bahkan, beberapa game sudah menggunakan teknologi VR dan haptic feedback, membuat kita serasa benar-benar ada di lintasan balap. Nah, dalam artikel ini kita bakal bahas kenapa game balap motor tetap digandrungi, serta daftar rekomendasi game yang bisa kamu mainkan hari ini.
1. Mengapa Game Balap Motor Terus Digemari?
Salah satu alasan utama game balap motor tetap populer adalah karena gameplay-nya yang cepat dan menegangkan. Berbeda dengan game strategi yang butuh mikir panjang, game balap motor menuntut fokus dan respon cepat dalam waktu singkat. Ini yang bikin banyak orang ketagihan, karena dalam hitungan detik, posisi bisa berubah drastis – dari yang tadinya memimpin, jadi tertinggal karena salah belok atau jatuh di tikungan.
Selain itu, game balap motor punya daya tarik visual yang kuat. Grafik yang halus, efek suara mesin yang realistis, dan animasi detail dari lintasan balap membuat pemain betah berlama-lama. Bagi yang suka modifikasi, beberapa game juga menyediakan fitur custom motor, outfit rider, hingga desain helm.
2. Fitur-Fitur Penting dalam Game Balap Motor Modern
Biar game balap motor nggak cepat membosankan, pengembang biasanya menyematkan berbagai fitur tambahan. Salah satu fitur yang paling dicari adalah mode multiplayer. Mode ini memungkinkan pemain untuk bertanding dengan teman atau player dari seluruh dunia secara real-time. Sensasi adu skill dengan lawan nyata tentu lebih menantang daripada melawan AI.
Kemudian ada juga fitur upgrade motor, di mana pemain bisa meningkatkan performa mesin, rem, suspensi, dan ban. Ini menambah elemen strategi, karena pemain harus memilih upgrade yang sesuai dengan gaya balap mereka. Tak ketinggalan juga sistem ranking dan leaderboard yang bikin kompetisi makin sengit.
3. Rekomendasi Game Balap Motor Terbaik 2025
Berikut ini adalah beberapa game balap motor yang paling banyak dimainkan dan mendapatkan review positif di tahun 2025:
a. MotoGP 25
Game resmi dari ajang MotoGP ini selalu update setiap tahun. Di versi 2025, grafisnya makin realistis dengan lighting dan efek hujan yang memukau. Fitur Career Mode juga lebih dalam, memungkinkan pemain membangun tim balap sendiri, memilih sponsor, dan mengatur strategi di setiap balapan.
b. Racing Fever: Moto X
Game ini cocok buat yang suka balap jalanan dengan gaya freestyle. Racing Fever: Moto X punya kontrol sederhana tapi adiktif. Ada berbagai mode permainan seperti Time Attack, Endless, dan Free Ride. Game ini juga ringan dan cocok dimainkan di perangkat menengah.
c. Mad Skills Motocross 4
Bagi yang suka game 2D dengan fisika realistis, Mad Skills Motocross 4 jadi pilihan seru. Game ini mengandalkan skill dan timing buat melewati rintangan, tanjakan, dan lompatan. Banyak event mingguan yang bikin pemain terus kembali untuk bermain.
d. Real Moto 2
Game ini menghadirkan pengalaman balap motor yang cukup realistis untuk versi mobile. Dengan kontrol kemiringan dan sistem kamera dinamis, Real Moto 2 terasa seperti simulasi balap motor sungguhan. Cocok buat yang suka balapan serius tapi nggak mau ribet.
4. Tips Bermain Game Balap Motor Biar Gampang Menang
Buat kamu yang ingin jadi raja di lintasan, berikut beberapa tips jitu yang bisa diterapkan:
Kuasai Kontrol Motor : Latihan jadi kunci. Makin sering kamu main, makin peka juga dengan respons motor di berbagai tikungan dan medan.
Perhatikan Tipe Motor dan Karakteristiknya : Setiap motor punya spesifikasi berbeda. Ada yang cocok untuk akselerasi, ada yang unggul di top speed. Sesuaikan dengan lintasan.
Gunakan Fitur Upgrade Secara Cerdas : Jangan asal-upgrade. Fokuslah pada aspek yang paling kamu butuhkan, misalnya akselerasi jika kamu sering kalah di awal lomba.
Pelajari Lintasan : Hafalkan tikungan dan jalur pintas. Beberapa game memiliki shortcut tersembunyi yang bisa memangkas waktu tempuh.
Jangan Panik Saat Tabrakan : Kalau sempat crash atau keluar jalur, tetap tenang. Fokus memperbaiki posisi daripada frustasi.
5. Game Balap Motor dan Komunitasnya
Di luar gameplay, banyak game balap motor yang memiliki komunitas aktif. Mereka berbagi tips, turnamen, hingga modifikasi visual. Di platform seperti Discord, Reddit, dan forum game, kamu bisa menemukan komunitas yang ramah dan penuh informasi. Beberapa game bahkan rutin mengadakan kompetisi dengan hadiah menarik, seperti skin eksklusif atau merchandise.
Gabung ke komunitas ini bisa jadi cara bagus buat meningkatkan kemampuan sekaligus cari teman main yang selevel. Selain itu, komunitas juga tempat terbaik buat tahu update terbaru, patch, dan bocoran fitur selanjutnya.
Penutup: Saatnya Gaspol di Dunia Virtual
Game balap motor di tahun 2025 membawa pengalaman yang makin kaya dan mendalam. Baik kamu pemain kasual yang ingin bersenang-senang atau kompetitor serius yang mengincar leaderboard, ada banyak pilihan game yang bisa kamu coba. Dengan perkembangan teknologi dan semakin kuatnya komunitas gamer, game balap motor dipastikan masih akan terus ngebut di hati para penggemarnya. Kalau kamu belum coba salah satu game yang direkomendasikan di atas, sekarang saatnya gaspol dan rasakan sendiri sensasi serunya!
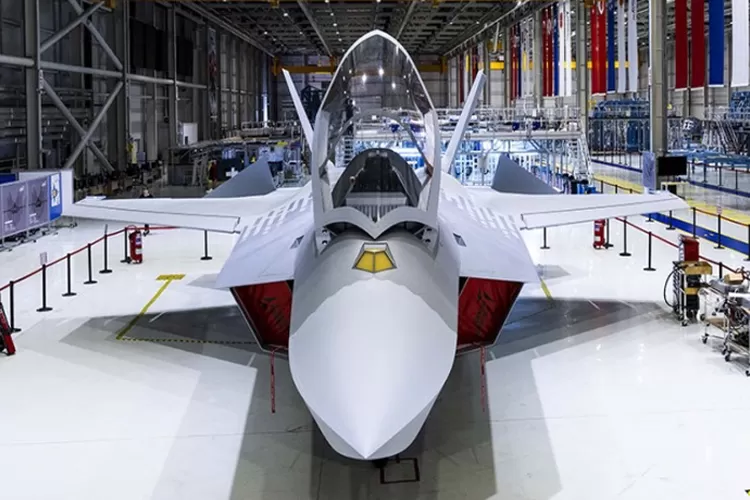
Indonesia tengah bersiap memasuki era baru pertahanan udara dengan rencana pembelian jet tempur generasi kelima asal Turki, Kaan. Pesawat ini bukan sekadar mesin perang biasa, namun dilengkapi dengan sistem siluman mutakhir yang membuatnya nyaris tak terdeteksi radar musuh. Ketertarikan Indonesia terhadap Kaan menandai lompatan signifikan dalam kemampuan alutsista udara nasional yang sebelumnya bergantung pada pesawat tempur generasi keempat.
Apa Itu Sistem Siluman pada Jet Tempur?
Sistem siluman atau stealth technology merupakan serangkaian teknologi desain dan material yang memungkinkan pesawat untuk meminimalisir jejak radar, infra merah, suara, dan bahkan visual. Tujuan utamanya adalah agar pesawat bisa menghindari deteksi oleh sistem pertahanan musuh. Dalam konteks jet tempur seperti Kaan, teknologi ini mencakup desain aerodinamis yang tajam, lapisan cat penyerap radar (radar-absorbent materials), dan penempatan mesin serta senjata di posisi strategis yang tidak mengganggu jejak radar.
Teknologi Siluman yang Dimiliki Kaan
Kaan, yang dikembangkan oleh Turkish Aerospace Industries (TAI), dirancang dengan profil radar rendah. Hal ini dimungkinkan melalui penggunaan material komposit ringan, sudut tajam yang memecah gelombang radar, serta internal weapons bay yang menyimpan senjata di dalam badan pesawat. Tidak seperti pesawat konvensional yang menggantungkan rudal di luar, sistem ini memastikan bahwa permukaan pesawat tetap bersih dari struktur mencolok.
Selain itu, mesin Kaan ditempatkan dalam konfigurasi twin-engine dengan exhaust nozzle yang dirancang untuk mengurangi jejak termal. Ini penting untuk menghindari deteksi dari rudal berpemandu infra merah. Desain intake udara juga dibuat menyudut dan tersembunyi dari pandangan langsung radar musuh, menambah keunggulan siluman jet ini.
Alasan Indonesia Melirik Jet Tempur Kaan
Indonesia, sebagai negara kepulauan dengan luas wilayah yang sangat besar, membutuhkan sistem pertahanan udara yang andal dan canggih. Dengan meningkatnya tensi geopolitik di kawasan Asia-Pasifik, penguatan armada udara menjadi prioritas. Jet tempur Kaan menawarkan solusi lengkap dari sisi performa, teknologi, dan harga yang relatif kompetitif jika dibandingkan dengan F-35 dari Amerika Serikat.
Kemitraan antara Indonesia dan Turki juga telah berkembang dalam berbagai sektor strategis, termasuk pertahanan. Rencana pembelian Kaan bisa menjadi bagian dari kerja sama jangka panjang yang membuka pintu transfer teknologi dan pelatihan pilot serta teknisi lokal.
Perbandingan Kaan dengan Jet Siluman Lain
Secara teknologi, Kaan berada di kelas yang sama dengan jet tempur F-35 Lightning II dan Su-57 Felon dari Rusia. Meskipun belum memiliki rekam jejak operasional sebesar F-35, Kaan menawarkan sejumlah fitur serupa, termasuk radar AESA canggih, sensor fusion, dan kemampuan operasi network-centric.
Kelebihan Kaan terletak pada fleksibilitas desainnya yang masih memungkinkan modifikasi sesuai kebutuhan negara pembeli. Indonesia, misalnya, bisa mengajukan konfigurasi spesifik seperti sistem navigasi berbasis satelit lokal atau persenjataan yang sesuai dengan kebutuhan strategis TNI AU.
Tantangan dan Prospek ke Depan
Meski menjanjikan, akuisisi jet tempur Kaan juga bukan tanpa tantangan. Proses sertifikasi, pelatihan personel, dan integrasi ke dalam sistem komando dan kontrol TNI AU memerlukan waktu dan anggaran signifikan. Selain itu, karena Kaan masih dalam tahap awal produksi massal, kemungkinan adanya penyesuaian teknis juga harus diantisipasi.
Namun demikian, dengan pendekatan diplomatik dan manajemen proyek yang matang, jet tempur Kaan berpotensi menjadi tulang punggung kekuatan udara Indonesia dalam dekade mendatang. Investasi dalam teknologi siluman seperti ini bukan hanya memperkuat pertahanan, tetapi juga menunjukkan komitmen Indonesia dalam modernisasi militer.
Lompatan Strategis Menuju Pertahanan Modern
Jet tempur Kaan bukan sekadar alat militer, melainkan simbol transformasi Indonesia menuju kekuatan udara modern. Teknologi siluman yang dimilikinya memungkinkan operasi udara yang lebih efektif, aman, dan strategis. Di tengah dinamika kawasan yang semakin kompleks, kehadiran Kaan di jajaran alutsista TNI AU akan membawa dampak besar dalam menjaga kedaulatan dan keamanan nasional. Dengan perencanaan yang tepat, pembelian jet ini dapat menjadi langkah strategis menuju era pertahanan udara yang lebih unggul dan adaptif terhadap ancaman masa depan.
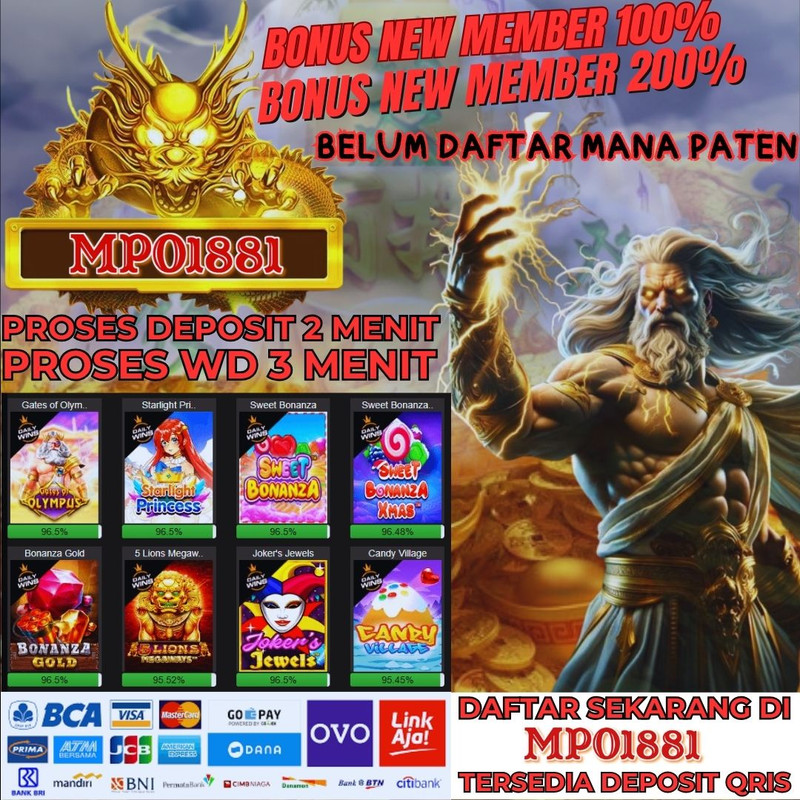
MPO1881 semakin dikenal sebagai salah satu situs slot online terbaik di Indonesia, terutama bagi para pemain yang ingin bermain praktis dengan modal kecil. Dengan fitur deposit Dana minimal 5000 tanpa potongan, MPO1881 menawarkan akses bermain yang sangat terjangkau namun tetap menghadirkan peluang menang besar setiap hari.
Slot Gacor Deposit 5K: Solusi Main Hemat, Untung Maksimal
Tak perlu modal besar untuk merasakan sensasi jackpot. MPO1881 membuka peluang untuk semua pemain dengan sistem minimal depo hanya 5.000 rupiah via Dana. Meski terjangkau, kualitas permainan tetap premium. Berbagai pilihan game slot gacor dari provider ternama seperti:
Pragmatic Play
PG Soft
Habanero
Joker Gaming
Spadegaming
…disediakan lengkap dan mudah diakses kapan saja.
Transaksi Mudah & Cepat dengan Dana Tanpa Potongan
Salah satu keunggulan MPO1881 adalah kemudahan transaksi. Kamu bisa deposit dan withdraw via Dana tanpa potongan dan langsung diproses secara otomatis hanya dalam hitungan detik. Ini menjadikan MPO1881 pilihan utama untuk para pemain yang mengutamakan efisiensi dan kenyamanan.
Kenapa Harus Pilih MPO1881?
✅ Slot Gacor Setiap Hari – RTP tinggi dan pola menang yang stabil ✅ Minimal Deposit 5K – Cocok untuk pemula atau yang ingin coba dulu ✅ Dana Tanpa Potongan – Transaksi 100% masuk tanpa potong biaya ✅ Bonus Melimpah – Bonus member baru, harian, cashback, dan referral ✅ CS Online 24 Jam – Siap bantu kapan saja jika ada kendala ✅ Akses Mudah via Mobile & Desktop – Tanpa aplikasi ribet
Gampang Menang di MPO1881
Dengan RTP tinggi dan update rutin pola slot gacor, MPO1881 jadi tempat bermain slot yang gampang menang. Banyak member setia yang rutin menarik kemenangan, bahkan hanya dari modal kecil seperti 5 ribu saja.
Penutup
Buat kamu yang ingin mulai bermain slot online dengan modal minim namun peluang menang besar, MPO1881 adalah pilihan paling masuk akal. Daftar sekarang, klaim bonusnya, dan rasakan sendiri sensasi bermain di situs slot Dana 5K gacor tanpa potongan yang benar-benar terbukti gampang menang!
Di tahun 2025 ini, popularitas slot online semakin meroket, menarik jutaan pemain untuk mencoba peruntungan mereka. Namun, di tengah banyaknya pilihan situs yang bertebaran, tantangan terbesar adalah bagaimana memilih platform yang benar-benar terpercaya. Memilih situs yang salah bisa berujung pada pengalaman bermain yang tidak adil atau bahkan penipuan. Panduan ini akan membantu Anda mengidentifikasi ciri-ciri utama situs slot online terpercaya, memastikan Anda bermain dengan tenang dan aman.
1. Perhatikan Lisensi dan Regulasi Resmi
Lisensi adalah indikator paling krusial dari sebuah situs slot online yang terpercaya. Situs yang sah dan legal akan selalu menampilkan informasi lisensi mereka dengan jelas di halaman utama atau bagian bawah (footer) situs.
Pentingnya Lisensi Resmi:
Keamanan Terjamin: Lisensi dikeluarkan oleh otoritas perjudian yang ketat, yang berarti situs tersebut telah memenuhi standar keamanan dan keadilan tertentu.
Perlindungan Pemain: Otoritas lisensi juga berfungsi sebagai pihak ketiga yang bisa Anda hubungi jika terjadi perselisihan atau masalah yang tidak terselesaikan dengan situs.
Contoh Lisensi: Cari lisensi dari lembaga seperti PAGCOR (Philippine Amusement and Gaming Corporation), Malta Gaming Authority (MGA), UK Gambling Commission, atau Curacao eGaming. Kehadiran lisensi ini memastikan bahwa operasional situs diawasi dan diatur.
2. Kualitas dan Reputasi Provider Game
Situs terpercaya selalu bermitra dengan provider game terkemuka di industri. Provider besar seperti Pragmatic Play, PG Soft, Microgaming, Habanero, atau Spadegaming dikenal karena menghasilkan game berkualitas tinggi dengan RTP (Return To Player) yang transparan dan fair.
Mengapa Provider Ternama Penting:
Game Fair:Game dari provider ternama telah diuji dan disertifikasi oleh lembaga independen untuk memastikan hasil yang acak dan adil (menggunakan RNG – Random Number Generator).
Pengalaman Bermain Optimal: Kualitas grafis, audio, dan gameplay yang unggul membuat pengalaman bermain lebih menyenangkan dan imersif.
Transparansi RTP:Provider terkemuka menyediakan informasi RTP yang jelas, memungkinkan pemain membuat pilihan yang lebih bijak.
3. Sistem Transaksi yang Aman, Cepat, dan Beragam
Situs slot online terpercaya memahami pentingnya kemudahan dan keamanan dalam hal deposit dan penarikan dana.
Fitur Transaksi yang Harus Ada:
Metode Pembayaran Bervariasi: Dukungan untuk berbagai metode pembayaran populer di Indonesia, seperti transfer bank lokal (BCA, Mandiri, BRI, BNI), e-wallet (OVO, Dana, GoPay), dan bahkan pulsa.
Proses Cepat: Deposit dan penarikan dana diproses dengan cepat dan efisien, tanpa penundaan yang tidak wajar.
Keamanan Data: Penggunaan teknologi enkripsi (SSL) untuk melindungi data finansial dan pribadi Anda dari akses tidak sah. Pastikan URL situs diawali dengan https://.
4. Layanan Pelanggan yang Responsif dan Profesional
Dukungan pelanggan yang baik adalah cerminan dari komitmen sebuah situs terhadap pemainnya. Situs terpercaya akan menyediakan layanan pelanggan 24/7 yang responsif, ramah, dan mampu menyelesaikan masalah dengan cepat.
Ciri Layanan Pelanggan Terbaik:
Tersedia 24/7: Melalui berbagai saluran seperti Live Chat, WhatsApp, Telegram, atau email.
Respons Cepat: Menjawab pertanyaan dan menyelesaikan masalah dalam waktu singkat.
Informasi Jelas: Mampu memberikan informasi yang akurat dan membantu tentang game, promosi, atau masalah teknis.
5. Reputasi dan Ulasan Pengguna
Sebelum mendaftar, luangkan waktu untuk mencari ulasan dan reputasi situs di forum online, media sosial, atau situs ulasan independen. Pengalaman pemain lain seringkali menjadi cerminan akurat dari kualitas sebuah situs.
Perhatikan Ulasan:
Cari tahu apa yang dikatakan pemain lain tentang pembayaran, gameplay, dan layanan pelanggan.
Situs dengan reputasi yang kuat dan ulasan positif dari komunitas pemain biasanya adalah pilihan yang aman.
Kesimpulan
Memilih situs slot online terpercaya di tahun 2025 memerlukan ketelitian dan pemahaman tentang faktor-faktor kunci di atas. Dengan memprioritaskan lisensi resmi, provider berkualitas, sistem transaksi aman, layanan pelanggan responsif, dan reputasi yang baik, Anda bisa memastikan pengalaman bermain yang aman dan menyenangkan. Salah satu platform yang memenuhi semua kriteria ini adalah QQSUPER99, yang telah membuktikan diri sebagai destinasi pilihan bagi para pecinta slot online. Selalu bermain secara bertanggung jawab dan nikmati setiap putaran Anda.
Korupsi bukan hanya sekadar pelanggaran hukum, tapi juga sebuah bentuk pengkhianatan terhadap bangsa dan rakyat. Ia bagaikan penyakit kronis yang menggerogoti sistem dari dalam, menghancurkan kepercayaan publik, dan memperlambat laju pembangunan. Jika dibiarkan, korupsi dapat menjadi jalan cepat menuju kehancuran bangsa.
Korupsi dan Dampaknya pada Kehidupan Masyarakat
Dampak korupsi tidak hanya terasa di ruang pemerintahan, tetapi juga menyentuh langsung kehidupan rakyat kecil. Uang yang seharusnya digunakan untuk membangun sekolah, rumah sakit, jalan, dan fasilitas umum lainnya justru masuk ke kantong pribadi oknum tak bertanggung jawab. Akibatnya, masyarakat kehilangan haknya atas layanan publik yang layak.
Bayangkan seorang anak di pelosok negeri harus belajar di sekolah yang hampir roboh karena dana pembangunan diselewengkan. Atau seorang pasien yang tak tertolong karena fasilitas rumah sakit tak memadai akibat dana kesehatan dikorupsi. Ini bukan sekadar cerita—ini adalah kenyataan yang terjadi ketika korupsi dibiarkan tumbuh.
Mengapa Korupsi Terus Terjadi?
Korupsi seringkali terjadi karena lemahnya pengawasan, rendahnya integritas pejabat, dan budaya permisif di masyarakat. Ketika korupsi dianggap sebagai hal “biasa” atau “risiko jabatan”, maka kita sedang membiarkan api kecil membesar menjadi kebakaran besar. Ironisnya, pelaku korupsi sering mendapat perlakuan lunak, sementara rakyat menanggung akibatnya.
Bangsa yang Ingin Maju Harus Bersih dari Korupsi
Tidak ada negara maju yang berhasil tanpa memberantas korupsi. Negara-negara dengan tingkat korupsi rendah cenderung memiliki sistem pendidikan yang baik, layanan kesehatan yang memadai, dan ekonomi yang stabil. Sebaliknya, negara dengan tingkat korupsi tinggi selalu terjebak dalam kemiskinan, ketimpangan, dan ketidakadilan.
Apa yang Bisa Kita Lakukan?
Perubahan tidak hanya datang dari atas, tapi juga dari bawah. Sebagai warga negara, kita memiliki peran penting untuk:
Menolak praktik suap dan pungli.
Melaporkan tindakan korupsi yang kita ketahui.
Mendidik generasi muda tentang pentingnya integritas.
Mendukung penegakan hukum yang tegas terhadap koruptor.
Penutup
Korupsi memang bukan masalah baru, tapi bukan berarti tidak bisa diberantas. Selama masih ada yang peduli, masih ada harapan. Mari bersama-sama menutup jalan korupsi, dan membuka jalan masa depan yang lebih bersih, adil, dan bermartabat. Karena korupsi bukan hanya mencuri uang negara, tapi juga mencuri masa depan kita semua.
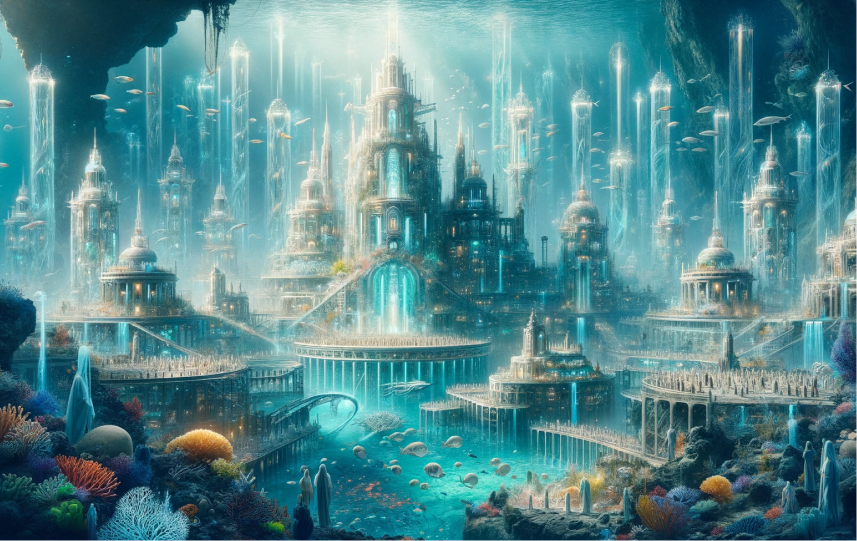
Peradaban Atlantis telah lama menjadi topik yang memikat para peneliti, penulis, dan pecinta sejarah. Cerita tentang kota yang maju, kaya, dan tenggelam dalam semalam ini berasal dari tulisan Plato, filsuf Yunani kuno, sekitar tahun 360 SM.
Namun, hingga kini, tidak ada bukti arkeologis yang membuktikan keberadaannya secara pasti. Lalu, benarkah Atlantis pernah ada?
📜 Asal Usul Kisah Atlantis
Plato pertama kali menyebut Atlantis dalam dua karyanya: Timaeus dan Critias. Menurutnya:
Atlantis adalah kerajaan besar yang berada “di luar Pilar Herkules” (dipercaya sebagai Selat Gibraltar).
Kota ini makmur, memiliki teknologi canggih, dan sistem pemerintahan yang maju.
Karena kesombongan dan moralitas yang rusak, Atlantis dihancurkan oleh para dewa dalam satu hari dan tenggelam ke dasar laut.
Banyak yang meyakini cerita ini hanyalah alegori moral, bukan catatan sejarah.
🧪 Upaya Penemuan Atlantis
Sejak zaman modern, banyak peneliti mencoba mencari lokasi Atlantis. Beberapa teori populer menyebutkan bahwa Atlantis mungkin berada di:
1. Laut Mediterania
Beberapa ilmuwan yakin Atlantis berada di sekitar pulau Santorini (Thera), yang pernah hancur karena letusan gunung berapi besar.
2. Samudra Atlantik
Teori klasik mengatakan Atlantis ada di tengah Samudra Atlantik, namun belum ditemukan bukti konkret.
3. Laut Karibia dan Benua Amerika
Ada juga yang percaya Atlantis adalah bagian dari peradaban kuno di Amerika Tengah seperti Maya atau Aztec.
4. Indonesia (Nusantara)
Beberapa peneliti lokal mengaitkan Atlantis dengan peradaban purba di wilayah Nusantara, merujuk pada teori “Sundaland”.
⚖️ Atlantis dalam Perspektif Ilmiah
Kebanyakan arkeolog dan sejarawan menganggap Atlantis sebagai fiksi atau metafora, bukan fakta sejarah. Mereka percaya Plato menulisnya sebagai kritik terhadap politik Athena saat itu.
Namun, sebagian ilmuwan alternatif tetap yakin bahwa Atlantis benar-benar ada dan belum ditemukan karena:
Tenggelam terlalu dalam
Tertutup oleh waktu dan alam
Belum ditemukan teknologi pencarian yang memadai
💡 Pelajaran dari Atlantis
Terlepas dari benar atau tidaknya, kisah Atlantis menyimpan banyak pelajaran:
Kesombongan dan kerakusan bisa menghancurkan peradaban.
Teknologi tidak menjamin kelangsungan hidup tanpa moralitas.
Setiap kejayaan bisa sirna jika tak dijaga dengan kebijaksanaan.
🧭 Penutup
Apakah Atlantis hanya dongeng atau benar-benar pernah ada? Sampai sekarang, jawabannya masih menjadi misteri yang memancing rasa ingin tahu manusia. Namun satu hal pasti — kisah ini terus menginspirasi pencarian akan peradaban yang hilang.
Dunia sedang berubah. Transaksi keuangan kini tak lagi bergantung pada uang tunai. Banyak orang mulai memilih metode pembayaran digital. Perubahan ini terjadi di seluruh dunia.
Apa Itu Ekonomi Digital?
Ekonomi digital adalah sistem keuangan yang berjalan dengan bantuan teknologi. Dalam sistem ini, uang tunai digantikan oleh:
Transfer bank online
Dompet digital
Kartu debit dan kredit
QR code dan e-money
Tujuannya sederhana: transaksi lebih cepat, aman, dan praktis.
Mengapa Banyak Orang Beralih?
Ada beberapa alasan mengapa masyarakat lebih memilih pembayaran digital:
Lebih Mudah dan Cepat Tak perlu antre atau membawa uang tunai. Cukup dengan ponsel.
Lebih Aman Risiko kehilangan uang tunai lebih kecil.
Terbukti Efisien Bisnis jadi lebih rapi dan mudah dalam pencatatan keuangan.
Dorongan Pandemi COVID-19 membuat banyak orang menghindari uang fisik karena alasan kesehatan.
Negara yang Sudah Maju Tanpa Uang Tunai
Beberapa negara menjadi contoh dalam menerapkan sistem ini:
Swedia: Hampir semua transaksi dilakukan secara digital.
Korea Selatan: Teknologi pembayaran digital sangat umum.
India: Program digitalisasi keuangan terus berkembang.
Apa Dampaknya bagi Masyarakat?
Positif:
Transaksi lebih mudah dan cepat.
Bisnis kecil bisa tumbuh lewat aplikasi pembayaran.
Mengurangi korupsi karena semuanya tercatat.
Negatif:
Tidak semua orang punya akses internet.
Keamanan data bisa menjadi masalah.
Ketergantungan teknologi meningkat.
Tantangan yang Harus Diatasi
Edukasi digital bagi masyarakat awam
Infrastruktur internet yang merata
Keamanan data yang lebih kuat
Kesimpulan
Dunia memang sedang bergerak menuju ekonomi tanpa uang tunai. Namun, agar sistem ini berjalan lancar dan adil, semua pihak harus siap. Pemerintah, pelaku bisnis, dan masyarakat harus saling mendukung agar transformasi ini memberi manfaat nyata bagi semua orang.